How to install wood panel PVC panels is not just a task; it’s an opportunity to transform your living space with elegance and durability. Embracing PVC panels offers myriad advantages, from their resistance to moisture and easy maintenance to their stunning variety of designs that mimic natural wood. This guide will equip you with essential insights into the installation process, making it accessible even for beginners eager to enhance their homes.
Before diving into the installation, it’s crucial to understand the tools and materials you’ll need, as well as the safety precautions to ensure a smooth experience. With proper preparation and surface preparation, you’ll be well on your way to achieving a stunning finish that elevates your interior design.


Introduction to Wood Panel PVC Panels
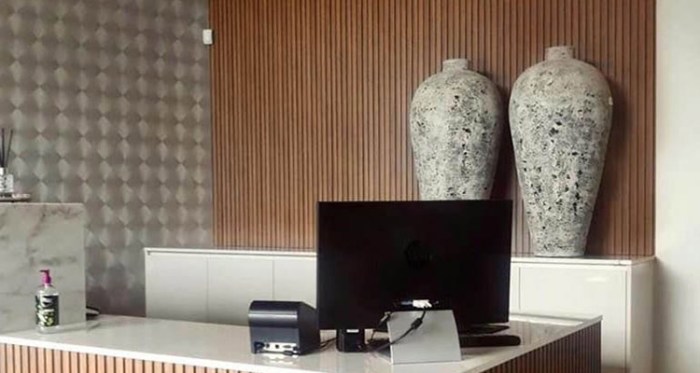
Wood panel PVC panels are an innovative solution for homeowners looking to enhance the aesthetic appeal of their spaces while achieving durability and low maintenance. Unlike traditional wood, PVC panels resist moisture, pests, and fading, making them ideal for varied environments, whether in kitchens, bathrooms, or living areas. This modern material allows for a range of designs that cater to diverse tastes and preferences, ensuring that every homeowner can find the perfect style for their project.
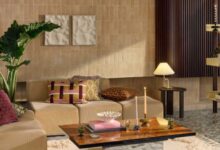
The design versatility of wood panel PVC panels is one of their key advantages. Available in various colors, textures, and finishes, these panels can mimic the look of natural wood without the associated upkeep. Homeowners can choose from sleek modern finishes to rustic appearances, allowing for personalization that complements existing decor. Whether opting for a classic oak or a contemporary whitewashed look, the choices are virtually limitless.
Installation of these panels is accessible for beginners, as they often come with user-friendly instructions and do not require specialized tools, making them a favored choice for DIY projects.
Benefits of Using PVC Panels
The advantages of utilizing PVC panels in home improvement projects extend beyond aesthetics. Here are some compelling reasons to consider these panels:
- Durability: PVC panels are resistant to water, termites, and rotting, ensuring they maintain their integrity over time.
- Low Maintenance: Unlike traditional wood, PVC does not require regular sealing, staining, or painting, which significantly reduces long-term upkeep costs.
- Easy Installation: With lightweight materials and interlocking designs, even novices can complete installations without professional help.
- Eco-Friendly Options: Many manufacturers offer panels made from recycled materials, appealing to environmentally conscious consumers.
- Cost-Effective: Due to their longevity and minimal maintenance needs, PVC panels can provide savings over time compared to wood alternatives.
The installation process typically involves measuring the intended area, cutting the panels to fit, and securing them in place using adhesive or nails. For beginners, it is essential to follow specific steps to ensure a seamless fit and finish. By starting with a clean surface and using appropriate tools, any homeowner can successfully enhance their space with wood panel PVC panels, transforming their environment with ease and confidence.
Preparing for Installation
Before diving into the exciting project of installing wood panel PVC panels, it’s crucial to ensure that you’re thoroughly prepared. This phase is not just about having the right materials; it’s about creating a workspace that facilitates a smooth installation process while prioritizing your safety and efficiency.For a successful installation, having a comprehensive list of tools and materials is essential.
This ensures that you won’t find yourself scrambling for a missing item mid-project, which can lead to frustration and delays. Here are the necessary tools and materials you’ll need:
Essential Tools and Materials
A well-prepared kit can make a significant difference. The following items are recommended for your installation:
- Wood panel PVC panels
- Measuring tape
- Utility knife or saw
- Level
- Adhesive or nails
- Caulk and caulking gun
- Pencil and notepad for notes
- Safety goggles and gloves
Each tool plays a pivotal role in the overall success of the installation. For instance, a level ensures that panels are perfectly aligned, while safety goggles protect your eyes from debris.Planning your installation area is also a fundamental step that can save you time and effort during the actual work. Accurate measurements are key to achieving a seamless finish. It’s advisable to take multiple measurements of the area where the panels will be installed.
Ensure you account for any obstacles such as outlets or windows within your measurements.
Measuring and Planning the Installation Area
Accurate measurements facilitate a better fit and reduce waste of materials. Here are steps to follow for effective planning:
- Measure the height and width of the wall or area where the panels will be applied.
- Sketch a layout of the area on your notepad, marking the locations of doors, windows, and any other features.
- Calculate the total square footage of the area to determine how many panels are needed.
- Consider the orientation of the panels, whether vertical or horizontal, which can affect the overall look.
Visualizing the installation area helps in anticipating any challenges that may arise during the installation.Safety should never be overlooked when embarking on any home improvement project. Taking the right precautions can help prevent accidents and ensure a safe working environment.
Safety Precautions
Before commencing the installation, it’s vital to prioritize safety. Observing certain precautions can mitigate risks significantly. Consider the following measures:
- Always wear safety goggles to protect your eyes from dust and debris.
- Use gloves when handling tools and materials to prevent cuts and injuries.
- Ensure your workspace is well-ventilated, especially when using adhesives.
- Check electrical outlets and wires before cutting into walls or ceilings.
Being proactive with safety measures can enhance your overall experience and keep you focused on achieving a great finish with your wood panel PVC panels.
Surface Preparation
Preparing your wall or surface for PVC panel installation is a crucial step in ensuring a seamless finish and longevity of your panels. Proper surface preparation helps to ensure that the panels adhere effectively and remain in place over time, preventing issues such as warping, bubbling, or detachment.The surface must be clean, dry, and free of any imperfections. This process involves several essential steps to guarantee a suitable foundation for the panels.
Following this guide will help you achieve a well-prepared surface that maximizes the performance of your PVC panels.
Cleaning and Leveling the Surface
Before you begin installing PVC panels, it is vital to clean and level the surface to provide a stable base. An uneven or dirty surface can lead to misalignment and visual defects in the finished product. Here is a detailed approach to preparing your surface:
1. Remove Existing Material
Start by removing any existing wallpaper, paint, or debris from the wall. This can be done using a scraper or a putty knife for stubborn materials. Ensure that you do not damage the underlying surface during this process.
2. Clean the Surface
Once the old material is removed, wipe down the surface with a damp cloth to collect dust and particles. For greasy or particularly dirty areas, a mild detergent mixed with water may be used. Rinse with clean water and allow it to dry completely.
3. Inspect for Holes and Cracks
After cleaning, inspect the surface for any holes, cracks, or imperfections. These should be filled with a suitable filler or putty, following the manufacturer’s instructions for drying times.
4. Level the Surface
Use a level to check for any uneven areas. If the surface is not level, you may need to use a leveling compound to create an even surface. This is especially important for larger areas where the discrepancies may not be visible at a glance.
5. Sand the Surface
Once any filler or leveling compound has dried, sand the surface lightly to ensure it is smooth. A fine-grit sandpaper can help achieve a professional finish, making it easier for the PVC panels to adhere properly.
6. Apply Primer If Necessary
Depending on the wall material, applying a primer may be beneficial. Primers help create a better bond between the PVC panels and the wall surface, particularly on porous or glossy surfaces. Ensure that the primer is suitable for use with PVC materials and allow it to dry completely before proceeding to installation.
“Proper surface preparation is essential for achieving a flawless finish and extending the lifespan of your PVC panels.”
By following these steps, your surface will be adequately prepared for PVC panel installation, ensuring a successful and aesthetically pleasing result.
Installing Wood Panel PVC Panels
Installing wood panel PVC panels can dramatically enhance the aesthetic appeal of any room, offering a blend of style and practicality. With proper installation techniques, these panels can transform your space while providing durability and ease of maintenance. This section Artikels the detailed steps necessary to effectively cut and secure your PVC panels to ensure a professional finish.
Cutting the Panels to Fit the Area
Achieving the right size and fit for wood panel PVC panels is crucial for a seamless installation. Here’s a step-by-step guide for cutting the panels accurately:
1. Measure the Area
Start by measuring the height and width of the wall to determine how many panels you will need. Use a measuring tape for precise measurements.
2. Mark the Panels
Based on your measurements, mark the cutting lines on the PVC panels with a fine-tip marker or pencil. Ensure the lines are straight and clearly visible.
3. Choose the Right Tool
Use a utility knife for thinner panels or a circular saw for thicker panels. Ensure the tool is sharp for clean cuts.
4. Cut the Panels
If using a utility knife, score along the marked line several times until the panel is sufficiently cut through. For a circular saw, set the blade depth and cut along the marked line steadily.
5. Smooth the Edges
After cutting, smooth the edges with sandpaper or a file to prevent any sharp corners that could cause injury or damage during installation.
Securing Panels to the Wall
There are multiple effective methods for securing wood panel PVC panels to your wall. Choosing the right method depends on your wall type and preference for permanence. The two primary techniques are:
Adhesive Method
This involves applying a strong adhesive specifically designed for PVC to the back of the panels. It’s ideal for smooth, clean surfaces and provides a seamless finish. Ensure the adhesive is evenly spread to avoid air pockets.
Nailing Method
This method employs finishing nails to attach the panels, providing a more traditional approach. It’s particularly effective for uneven surfaces. Use a nail gun for efficiency and ensure the nails are driven in at an angle for better grip.
Installation Process Steps
The installation process requires careful planning to achieve the best results. Follow these organized steps for a successful setup:
1. Prepare the Wall
Ensure the wall surface is clean, dry, and free from any debris to promote strong adhesion or secure nailing.
2. Lay Out the Panels
Before permanently fixing the panels, lay them out on the floor in the intended order to visualize the final look and make any necessary adjustments.
3. Apply Adhesive or Position Panels
If using adhesive, apply it to the back of the first panel. For nails, place the panel in position and begin securing it at the top.
4. Secure Additional Panels
Continue to add panels, ensuring they fit snugly next to each other. If using adhesive, press each panel firmly into place, and if using nails, ensure they are evenly spaced along the edges.
5. Check for Level
As you install, frequently check that panels are level using a spirit level to maintain a straight line across the entire wall.
6. Finish Edges and Corners
Once all panels are installed, address any gaps or uneven sections with caulk or trim for a polished look.
7. Cleanup
Remove any excess adhesive or debris from the installation area to complete the project.By adhering to these steps, you can ensure that your installation of wood panel PVC panels is not only aesthetically pleasing but also structurally sound, providing you with a beautiful and lasting addition to your home.
Finishing Touches
After successfully installing wood panel PVC panels, the next crucial step is to add the finishing touches. This phase not only enhances the overall appearance but also ensures the longevity and functionality of the installation. By focusing on details such as trimming edges, sealing joints, and considering aesthetic upgrades, you can elevate your space to a professional standard.
Trimming Edges and Corners for a Professional Finish
A clean and polished look is essential for any installation. Trimming edges and corners effectively provides a seamless transition between panels and adjoining surfaces. Use a high-quality utility knife or a circular saw for precise cuts. When trimming, ensure that you maintain a straight edge by employing a straight edge guide, providing a consistent finish across all cuts.
For corners, miter cuts at a 45-degree angle can create a smooth and attractive transition.
Pay attention to the fit of the panels—tight connections reduce the risk of moisture penetration and enhance durability.
Sealing and Maintaining Joints, How to install wood panel PVC panels
Sealing joints is imperative to prevent moisture infiltration, which can lead to mold and deterioration. Begin by applying a high-quality silicone caulk along all seams and edges where the panels meet each other or adjoining surfaces. This flexible sealant moves with the materials, maintaining its effectiveness over time.
It’s recommended to check the seal periodically, especially in high-humidity areas, to ensure integrity.
Use a caulking tool to smooth out the caulk for a professional look. Additionally, a layer of waterproof sealant can be applied over the caulk once it has dried to further enhance moisture resistance.
Painting and Decorating Options for Aesthetics
Once the installation and sealing are complete, consider painting or decorating the PVC panels to match your desired aesthetic. PVC panels readily accept paint, but it is advisable to use a paint specifically formulated for plastic surfaces. This type of paint adheres well and offers durability.
Before painting, ensure the surface is thoroughly cleaned and lightly sanded to improve adhesion.
You can also consider adding decorative elements such as trim, moldings, or wall decals for a personalized touch. These enhancements can dramatically shift the ambiance of your space, making it more inviting and visually appealing.
In summary, the finishing touches you apply to your wood panel PVC panels play a significant role in the overall effectiveness and appreciation of your installation.
By focusing on details such as trimming, sealing, and decorative enhancements, you can ensure a professional-grade finish that not only looks great but stands the test of time.
Maintenance of Wood Panel PVC Panels: How To Install Wood Panel PVC Panels
Maintaining wood panel PVC panels is essential to ensure their longevity and visual appeal. These synthetic panels, designed to mimic the look of real wood, require specific care to keep them looking pristine and functioning effectively over time. Understanding how to clean, prevent damage, and inspect your panels can significantly enhance their durability and aesthetic value.
Cleaning Procedures for PVC Panels
Regular cleaning is crucial for maintaining the appearance and performance of wood panel PVC panels. Unlike traditional wood, PVC panels are resistant to moisture, making them easier to clean. The following are recommended cleaning methods to keep your panels looking fresh:
- Use a mild detergent mixed with warm water for routine cleaning. A soft cloth or sponge will effectively remove dirt and grime without scratching the surface.
- For stubborn stains, a non-abrasive cleaner can be applied. Ensure to follow the manufacturer’s guidelines to avoid damaging the finish.
- Rinse thoroughly with clean water after washing to prevent detergent residue buildup. This helps maintain the panels’ luster.
Addressing Common Issues: Scratches and Fading
Despite their durability, wood panel PVC panels may experience scratches or fading over time due to wear and exposure to sunlight. Addressing these issues promptly can prevent further damage. Here are some effective strategies:
- Minor scratches can often be minimized using a PVC scratch repair kit, available at most home improvement stores. These kits usually contain colored compounds that blend with the panel finish.
- For deeper scratches, sanding lightly with fine-grit sandpaper can be effective. Always test in an inconspicuous area first to ensure color consistency is maintained.
- To combat fading, consider applying a UV-resistant sealant every few years. This layer protects against sun damage and helps retain the color and shine of the panels.
Periodic Inspections for Long-Term Durability
Conducting regular inspections of your PVC panels is vital for long-term maintenance. This proactive approach allows you to identify and address potential issues before they become significant problems. To facilitate your inspections, consider the following points:
- Check for signs of wear, such as cracks or peeling, especially in high-traffic areas or where the panels are exposed to direct sunlight.
- Inspect the seams between panels for gaps or deterioration. These areas can be prone to moisture infiltration if not adequately sealed.
- Assess the overall cleanliness of the panels and perform any necessary cleaning to prevent dirt accumulation that can lead to discoloration or degradation.
Regular maintenance not only enhances the lifespan of wood panel PVC panels but also ensures they maintain their aesthetic appeal.
Summary
In summary, installing wood panel PVC panels can be a rewarding endeavor that brings both beauty and functionality to your home. By following the Artikeld steps for preparation, installation, and maintenance, you can ensure your panels not only look great but also stand the test of time. With a little effort and attention to detail, your newly adorned walls will surely impress and enhance your living environment for years to come.