Custom Home Building: What You Need to Know Before Starting – embarking on this journey is a thrilling yet complex undertaking. It’s a blend of creative vision, meticulous planning, and savvy financial management. From securing the perfect plot of land and navigating zoning regulations to selecting the right builder and managing the construction process, the path to your dream home is paved with crucial decisions.
This guide equips you with the knowledge to confidently navigate each step, minimizing stress and maximizing the chances of a successful build.


Building your own home is a significant investment, both financially and emotionally. Understanding the intricacies of budgeting, design, material selection, and the overall construction process is vital to avoiding costly mistakes and ensuring the final product aligns perfectly with your vision. We’ll explore each stage in detail, providing actionable strategies and insights that will empower you to make informed choices throughout the entire process.
Get ready to transform your dream into a reality.
Planning & Budgeting: Custom Home Building: What You Need To Know Before Starting
Building your dream home is an exciting journey, but navigating the financial aspects can feel overwhelming. A well-defined budget is your compass, guiding you through the process and preventing costly surprises. Failing to plan properly can lead to significant delays, compromises on quality, and even project abandonment. This section details how to create a realistic budget and strategies for managing potential cost overruns.
Detailed Budget Creation
A comprehensive budget is the cornerstone of a successful custom home build. It’s more than just a simple estimate; it’s a detailed breakdown of every anticipated expense, categorized for clarity and easy tracking. This allows for proactive financial management and helps you make informed decisions throughout the construction phase. Remember, accuracy is paramount. Underestimating costs can lead to financial strain and compromise the quality of your final product.
Step-by-Step Budgeting Guide
Creating a realistic budget involves a methodical approach. First, gather detailed quotes from various contractors and suppliers for each aspect of the project. This includes everything from foundation work and framing to plumbing, electrical, and landscaping. Second, factor in soft costs such as architectural fees, permits, and legal expenses. These are often overlooked but can significantly impact your overall budget.
Third, and critically, add a contingency fund – a crucial buffer for unforeseen expenses. A common rule of thumb is to allocate 10-20% of your total estimated cost as a contingency. Finally, review and refine your budget regularly, comparing your projected costs with actual expenses.
Common Budget Overruns and Mitigation Strategies
Unforeseen issues are inevitable in construction. Common budget overruns stem from unexpected site conditions (e.g., discovering unstable soil requiring extensive foundation work), changes in material costs (due to market fluctuations or supply chain disruptions), and scope creep (adding features or upgrades during the construction process). To mitigate these, thoroughly investigate the site beforehand, secure materials early if possible, and meticulously document any changes to the original plans, obtaining updated quotes before proceeding.
Regular communication with your contractor is also vital. By anticipating potential problems and proactively addressing them, you can significantly reduce the likelihood of significant budget overruns. For example, a project initially budgeted at $500,000 could easily see a $50,000-$100,000 overrun if these steps aren’t taken.
Sample Budget Table
| Item | Estimated Cost | Actual Cost | Notes |
|---|---|---|---|
| Land Acquisition | $150,000 | $152,000 | Slightly higher than estimated due to closing costs. |
| Foundation | $50,000 | $48,000 | Contractor found a more efficient method. |
| Framing | $75,000 | $77,000 | Increased lumber costs. |
| Plumbing | $30,000 | $30,500 | Minor adjustments needed. |
| Electrical | $40,000 | $39,000 | Efficient wiring saved costs. |
| Interior Finishes | $100,000 | $105,000 | Upgraded flooring. |
| Exterior Finishes | $60,000 | $62,000 | Unexpected paint cost increase. |
| Landscaping | $25,000 | $23,000 | Found a better deal on plants. |
| Contingency | $50,000 | $30,000 | Used some for unexpected repairs. |
| Total | $530,000 | $531,500 | Overall within budget. |
Land Acquisition & Site Selection
Securing the perfect plot of land is arguably the most crucial step in your custom home building journey. It’s a decision that will impact not only the design and construction of your home but also its long-term value and your overall enjoyment of the property. This section delves into the key considerations for land acquisition and site selection, guiding you through the process with practical advice and insights.
Think of it as your comprehensive roadmap to finding the ideal location for your dream home.Choosing the right land involves more than just finding a pretty view. A thorough understanding of zoning regulations, soil conditions, and the overall suitability of the land for construction is paramount. Neglecting these factors can lead to costly delays, unforeseen expenses, and even the inability to build your desired home.
Let’s explore these crucial aspects in detail.
Zoning Regulations and Soil Conditions
Understanding local zoning regulations is absolutely vital. These regulations dictate what you can and cannot build on a particular piece of land, including factors like building height, setbacks (distance from property lines), and allowed square footage. Ignoring these rules can lead to significant delays and even prevent you from obtaining building permits. Similarly, soil conditions are critical. Poor soil can lead to foundation issues, increased construction costs, and even structural problems down the line.
A geotechnical investigation, involving soil testing by a qualified professional, is strongly recommended to assess the suitability of the soil for construction. For example, expansive clay soils can cause significant foundation movement, requiring specialized engineering solutions that add substantially to the overall project budget.
The Land Acquisition Process: Legal Aspects and Due Diligence
Acquiring land involves navigating a legal minefield. The process typically begins with identifying potential properties, followed by conducting thorough due diligence. This involves reviewing property surveys, title reports, and environmental assessments to ensure there are no encumbrances, easements, or environmental hazards affecting the land. Engaging a real estate attorney is highly recommended to guide you through the legal aspects of the purchase, ensuring a smooth and legally sound transaction.
Remember, a thorough due diligence process can prevent costly surprises down the line. For instance, an overlooked easement could severely restrict your building plans, or an undetected environmental contamination could lead to extensive remediation costs.
Comparing Different Land Types
Various land types present unique challenges and opportunities for custom home construction. Level lots are generally the easiest and most cost-effective to build on, minimizing excavation and foundation costs. Sloped lots, while offering scenic views, require more extensive site preparation, including potentially retaining walls and grading, which can significantly increase construction costs. Wetlands or floodplains pose even greater challenges, often requiring expensive mitigation measures or even precluding construction altogether.
The suitability of the land directly impacts the overall project cost and timeline. For example, building on a steeply sloped lot might require specialized engineering solutions and increased excavation, adding thousands to the overall budget.
Essential Steps for Land Acquisition: A Checklist
Before making an offer on a building lot, a comprehensive checklist can help ensure you haven’t overlooked any crucial steps.
- Identify your needs and preferences: Consider location, size, views, and proximity to amenities.
- Conduct thorough research: Investigate zoning regulations, soil conditions, and potential environmental concerns.
- Obtain a professional survey: Ensure accurate property boundaries and identify any potential issues.
- Review the title report: Verify ownership and identify any liens or encumbrances.
- Engage a real estate attorney: Secure legal representation to guide you through the purchase process.
- Negotiate the purchase agreement: Carefully review all terms and conditions before signing.
- Complete the purchase: Finalize the transaction and obtain clear title to the property.
Following this checklist meticulously will increase your chances of a successful and trouble-free land acquisition. Failing to conduct thorough due diligence can result in unexpected costs and delays.
Design & Architectural Planning
Designing your dream home is more than just picking paint colors; it’s a collaborative journey that blends your vision with the expertise of a skilled architect. This stage is crucial for translating your lifestyle needs and aesthetic preferences into a functional and beautiful living space. Careful planning here minimizes costly changes later in the construction process.
The homeowner-architect collaboration is a dynamic process. Think of the architect as your guide, navigating the complexities of design and construction while ensuring your vision is realized. Open communication is paramount. Regular meetings, detailed discussions about your lifestyle, and a shared understanding of your budget are essential. Bring mood boards, magazine clippings, and even sketches to illustrate your preferences.
Your architect will then translate these aspirations into detailed blueprints, considering factors like site constraints, building codes, and material choices. This iterative process ensures the final design is a perfect reflection of your needs and wants.
Architectural Styles and Associated Costs
Different architectural styles carry distinct aesthetic features and cost implications. The complexity of design, the materials used, and the level of detail all contribute to the overall price. For instance, a Craftsman-style home, known for its handcrafted details and natural materials, typically falls within a higher price range than a more minimalist contemporary design. Similarly, a sprawling Victorian home, with its ornate detailing and extensive use of wood, will command a significantly higher cost than a ranch-style home.
Consider these examples: A simple, single-story ranch home might cost between $150 and $250 per square foot, while a more elaborate two-story colonial could easily exceed $300 per square foot. These are rough estimates and can vary greatly depending on location, materials, and finishes. Always obtain detailed cost breakdowns from your builder.
Designing for Functionality and Aesthetics
Balancing form and function is key to a successful home design. Consider how you live, entertain, and relax. A well-designed home anticipates your needs, offering seamless flow between spaces. For example, an open-plan kitchen flowing into a dining area creates a welcoming space for entertaining, while a dedicated home office provides a quiet workspace. Prioritize natural light and ventilation for a healthier, more comfortable living environment.
Remember that incorporating sustainable design elements not only benefits the environment but can also lead to long-term cost savings.
Comparison of Architectural Styles
Understanding the pros and cons of various architectural styles helps you make an informed decision that aligns with your budget and lifestyle. Below is a comparison table highlighting key features and cost considerations.
| Architectural Style | Pros | Cons | Estimated Cost Range (per sq ft) |
|---|---|---|---|
| Ranch | Single-story, affordable, easy to maintain | Can feel less spacious, limited architectural detail | $150 – $250 |
| Colonial | Classic, elegant, versatile | Can be expensive, requires more maintenance | $250 – $350+ |
| Craftsman | Handcrafted details, natural materials, warm aesthetic | Can be expensive, requires specialized craftsmanship | $250 – $400+ |
| Contemporary | Clean lines, open floor plans, energy-efficient | Can feel stark or impersonal without careful design | $200 – $350+ |
Selecting a Builder & Contracts
Choosing the right custom home builder is arguably the most critical decision you’ll make throughout the entire process. This isn’t just about finding someone who can build a house; it’s about finding a partner who understands your vision, shares your commitment to quality, and can navigate the complexities of the project efficiently and transparently. A strong builder-client relationship, built on clear communication and mutual trust, is the bedrock of a successful custom home build.
Key Qualifications of a Custom Home Builder
Selecting a builder requires careful consideration of several crucial factors. Experience is paramount; look for builders with a proven track record of successfully completing projects similar in scope and style to your own. Check their portfolio for high-quality workmanship and attention to detail. Furthermore, thorough background checks, including verifying licenses and insurance, are essential to mitigate potential risks.
Financial stability is another key indicator; a financially sound builder is less likely to encounter unforeseen delays or cost overruns. Finally, strong communication skills and a collaborative approach are vital for a smooth and stress-free building experience. A builder who actively listens to your concerns and provides timely updates is a valuable asset.
The Importance of a Comprehensive Building Contract
The building contract is the legal agreement that Artikels the terms and conditions of your project. It’s your safeguard against misunderstandings and disputes. A well-drafted contract should clearly define the scope of work, payment schedule, timelines, materials specifications, and dispute resolution mechanisms. Without a comprehensive contract, you risk ambiguity and potential conflicts down the line, leading to delays, cost overruns, and even litigation.
Think of it as your insurance policy for a large and complex undertaking. Remember, a poorly written contract can be as damaging as having no contract at all.
Different Contract Types and Their Implications, Custom Home Building: What You Need to Know Before Starting
Several types of contracts exist in the construction industry, each with its own implications. A fixed-price contract, also known as a lump-sum contract, specifies a total price for the entire project. This offers predictability in terms of cost but may leave less room for flexibility during the construction process. A cost-plus contract, on the other hand, reimburses the builder for all costs incurred, plus a markup for profit.
This offers greater flexibility but carries a higher risk of cost overruns if not carefully managed. Understanding the pros and cons of each contract type is crucial for making an informed decision that aligns with your risk tolerance and budget. For example, a cost-plus contract might be suitable for a highly customized project where design changes are anticipated, while a fixed-price contract is better suited for projects with well-defined specifications.
Questions to Ask Potential Builders
Before committing to a builder, prepare a comprehensive list of questions to assess their qualifications and approach. Inquire about their experience with similar projects, their licensing and insurance coverage, their financial stability, and their communication style. Ask for references from previous clients and verify their satisfaction. Discuss their project management process, their approach to handling change orders, and their contingency plans for unforeseen circumstances.
For example, you might ask, “Can you provide examples of projects with similar design features and complexities?” or “What is your process for addressing potential delays or material shortages?”. The answers will provide valuable insights into their professionalism and ability to manage your project effectively.
Materials & Finishes

Choosing the right materials and finishes for your custom home is a crucial step, impacting not only the aesthetic appeal but also the long-term cost and environmental footprint. This phase requires careful consideration, balancing your budget with your vision for a durable and sustainable home. Making informed decisions here can save you significant money and headaches down the line.The impact of material selection extends beyond mere aesthetics.
Sustainable materials, such as reclaimed wood or bamboo flooring, can significantly reduce your home’s carbon footprint. Conversely, opting for less sustainable choices might lead to higher energy bills and contribute to environmental concerns. Furthermore, the durability of your chosen materials directly correlates with long-term maintenance costs. Investing in high-quality, durable materials upfront can save you considerable expense on repairs and replacements in the future.
Think of it as a long-term investment in your home’s value and your peace of mind.
Material Choices and Their Cost Implications
Different materials offer varying degrees of cost-effectiveness and longevity. For instance, solid hardwood flooring is a premium option, offering exceptional durability and aesthetic appeal, but comes with a higher price tag compared to engineered wood or laminate. Similarly, granite countertops are known for their elegance and resilience, but are typically more expensive than quartz or laminate alternatives. Understanding these cost differences allows you to prioritize based on your budget and preferences.
For example, you might choose to splurge on high-quality flooring in high-traffic areas and opt for more budget-friendly options in less-used spaces.
Material Options for Various Areas of the House
Let’s examine specific material choices for different parts of your home. For flooring, consider hardwood (solid or engineered), tile (ceramic, porcelain, or natural stone), laminate, and carpet. Each option offers a unique blend of durability, aesthetics, and cost. Countertop options range from granite and quartz to laminate and butcher block. Cabinetry can be crafted from solid wood (oak, cherry, maple), engineered wood, or even melamine, each influencing both cost and longevity.
For exterior siding, you might choose from brick, vinyl, fiber cement, or wood, each with its own lifespan and maintenance requirements.
Tips for Selecting Durable and Aesthetically Pleasing Materials
Prioritize durability in high-traffic areas. In kitchens and bathrooms, choose moisture-resistant materials. Consider the overall style and design of your home when selecting finishes. Don’t be afraid to mix and match materials to create a unique and personalized look. Always obtain samples and view them in your home’s lighting before making final decisions.
Remember, the initial cost isn’t the only factor; consider long-term maintenance and replacement costs.
Material Comparison Table
| Material | Cost (Approximate Range) | Durability Rating (1-5, 5 being highest) | Suitable For |
|---|---|---|---|
| Solid Hardwood Flooring | $8-$20+ per sq ft | 5 | Living rooms, bedrooms |
| Engineered Hardwood Flooring | $4-$12 per sq ft | 4 | Living rooms, bedrooms |
| Ceramic Tile | $2-$10 per sq ft | 4 | Bathrooms, kitchens |
| Granite Countertops | $50-$150+ per sq ft | 5 | Kitchens, bathrooms |
| Quartz Countertops | $40-$100+ per sq ft | 4 | Kitchens, bathrooms |
| Laminate Countertops | $10-$30 per sq ft | 2 | Kitchens, bathrooms (less demanding areas) |
The Construction Process
Building a custom home is a complex undertaking, a journey that transforms blueprints into a tangible reality. Understanding the typical phases involved is crucial for managing expectations and ensuring a smooth process. This section Artikels the key stages, highlighting the importance of communication and proactive planning to navigate potential challenges and delays. Think of it as a meticulously orchestrated symphony, where each instrument (trade) plays its part in creating a harmonious whole.
The construction process unfolds in a series of distinct phases, each building upon the previous one. From laying the foundation to the final walkthrough, each step demands attention to detail and careful coordination. Effective communication with your builder is paramount throughout this journey, fostering transparency and mitigating potential conflicts. This collaborative approach ensures everyone is on the same page, leading to a successful project delivery.
Foundation and Site Preparation
This initial phase sets the stage for the entire project. It involves excavating the site, pouring the foundation, and ensuring proper drainage and leveling. Any delays here can have a ripple effect throughout the construction schedule. Imagine the foundation as the bedrock of your home – its stability is paramount. A poorly prepared site can lead to significant issues later, impacting structural integrity and potentially leading to costly repairs down the line.
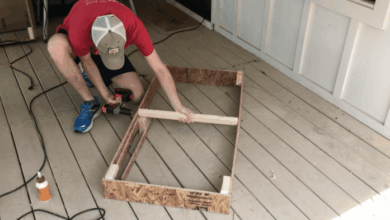
Framing and Roofing
Once the foundation is complete, the framing process begins, erecting the home’s skeleton. This involves constructing the walls, floors, and roof trusses. This phase is visually transformative, quickly giving shape to your home. The roof, once completed, provides protection from the elements, allowing interior work to progress more smoothly. This phase often sees the greatest visible progress in a short period.
Exterior Finishes
This stage focuses on the exterior aspects of the home, including siding, windows, doors, and exterior trim. Careful selection of materials and attention to detail are crucial for both aesthetics and durability. Think of this as dressing your home in its protective outer layer, shielding it from the elements and enhancing its curb appeal. The quality of materials chosen here will impact the longevity and maintenance of your home’s exterior.
Interior Finishes
With the exterior largely complete, work shifts to the interior. This encompasses drywall installation, painting, flooring, cabinetry, and fixture installation. This phase allows for significant personalization, reflecting your unique style and preferences. It’s where the house truly begins to feel like a home. Meticulous planning and material selection during this phase are key to achieving your desired aesthetic.
Mechanical, Electrical, and Plumbing (MEP) Systems
The installation of MEP systems is often interwoven with other phases, requiring precise coordination. This involves plumbing, electrical wiring, HVAC systems, and other essential utilities. These systems are often hidden from view but are critical for the functionality and comfort of your home. Proper installation and inspection are crucial for safety and efficiency.
Final Walkthrough and Handover
The final walkthrough is a crucial step, allowing you to inspect the completed home and identify any outstanding issues. This is your opportunity to ensure everything meets the agreed-upon specifications and quality standards. A thorough walkthrough helps avoid future problems and ensures a smooth transition into your new home. It is the culmination of the entire construction process.
Communication and Expectation Management
Regular communication with your builder is essential throughout the entire process. This involves scheduled meetings, progress updates, and prompt responses to any questions or concerns. Open communication fosters trust and helps manage expectations. Unexpected delays can occur, so having a realistic timeline and open lines of communication can help mitigate stress and potential conflicts. Transparency is key to a successful build.
Managing Potential Delays
Construction projects are inherently susceptible to delays. Factors such as weather conditions, material shortages, or unforeseen site conditions can all contribute to delays. Having a contingency plan in place can help minimize the impact of these delays. Open communication with your builder allows for proactive adjustments to the schedule, reducing stress and potential conflict. A well-defined contract with clear clauses addressing potential delays is crucial.
Timeline of the Construction Process
A typical custom home build can take anywhere from 6 months to a year or more, depending on factors such as size, complexity, and site conditions. The following timeline provides a general overview, although individual projects may vary.
- Site Preparation & Foundation: 4-8 weeks
- Framing & Roofing: 4-6 weeks
- Exterior Finishes: 6-8 weeks
- MEP Systems Installation: 4-6 weeks
- Interior Finishes: 8-12 weeks
- Final Walkthrough & Handover: 2-4 weeks
Permits & Inspections
Building your dream home is an exciting journey, but navigating the world of permits and inspections is crucial for a smooth and legal construction process. Ignoring these vital steps can lead to costly delays, legal battles, and even the forced demolition of your partially completed home. This section provides a clear understanding of the permitting process, helping you avoid common pitfalls and ensuring your project stays on track.
Obtaining the necessary building permits and undergoing regular inspections isn’t merely a bureaucratic hurdle; it’s a fundamental safeguard ensuring your home meets safety codes, zoning regulations, and local ordinances. These processes protect your investment, your family’s safety, and the overall integrity of your neighborhood. Think of permits and inspections as a quality control check, ensuring your home is built to the highest standards.
Navigating the Permitting Process
The permitting process varies by location, but generally follows a predictable sequence. Understanding these steps upfront saves time and frustration. A proactive approach is key. Begin early, gather all necessary documentation, and communicate effectively with your local building department.
First, you’ll need to submit a comprehensive application. This usually involves detailed architectural plans, engineering specifications, and site surveys. Be prepared to provide multiple copies, as requested. Once submitted, the application is reviewed by the building department, which may require revisions or additional information. This review process can take several weeks, depending on the complexity of the project and the workload of the department.
After approval, you’ll receive your building permit, allowing you to commence construction.
Common Permit Issues and Resolutions
While most permit applications proceed smoothly, some common issues can arise. For example, discrepancies between your plans and local zoning regulations are frequent. This might involve setbacks from property lines, height restrictions, or parking requirements. Addressing these discrepancies early, perhaps through consultations with architects or planning professionals, prevents significant delays. Another common issue is incomplete applications.
Ensure you submit all required documentation to avoid setbacks.
Another potential problem involves changes to the approved plans during construction. Any alterations, no matter how minor, generally require an amendment to the original permit. Failing to obtain this amendment can result in penalties or even halt construction. Always keep open communication with the building department throughout the entire process. If you anticipate any modifications, discuss them beforehand to obtain the necessary approvals.
This proactive approach significantly minimizes potential complications.
The Permit and Inspection Flowchart
Imagine a flowchart with distinct boxes representing each stage. The first box would be “Submit Application and Plans.” This leads to the “Department Review” box, which might branch into “Revisions Required” (looping back to “Submit Application and Plans”) or “Application Approved” leading to “Permit Issued”. Following permit issuance, the flowchart would illustrate a series of inspections at various stages of construction: “Foundation Inspection,” “Framing Inspection,” “Plumbing Inspection,” “Electrical Inspection,” “Final Inspection.” Each inspection box would have a potential branch for “Inspection Passed” moving to the next stage, or “Inspection Failed” leading to “Corrective Actions Required” which would then loop back to the relevant inspection stage.
The final box, reached after all inspections are successfully passed, would be “Certificate of Occupancy Issued.” This visual representation clearly Artikels the sequential nature of the process, highlighting potential points of delay or correction.
Financing & Payment Schedules
Building your dream home is a significant financial undertaking. Securing the right financing and establishing a clear payment schedule are crucial for a smooth and stress-free construction process. Understanding your options and managing your payments effectively will significantly impact your overall experience and final cost. This section will explore various financing methods, the importance of structured payments, and strategies for minimizing your financial burden.
Financing Options for Custom Home Construction
Custom home building typically requires a different approach to financing than purchasing an existing home. Traditional mortgages often aren’t sufficient to cover the phased payments involved in construction. Instead, most builders utilize construction loans or a combination of construction loans and permanent mortgages. Construction loans provide funding in stages, disbursed as the project progresses and verified by the lender.
Once the home is completed and inspected, the construction loan often converts into a permanent mortgage, simplifying your payments. Alternatively, some individuals may utilize a combination of savings, lines of credit, and a permanent mortgage to finance their build, though this requires significant upfront capital. Choosing the right financing option depends heavily on your financial situation, credit score, and the total cost of your project.
The Importance of a Clear Payment Schedule
A well-defined payment schedule is paramount for both the homeowner and the builder. It Artikels the payment milestones tied to specific construction phases, providing transparency and accountability. For the homeowner, a clear schedule facilitates better budget management and ensures funds are available when needed. For the builder, a structured payment plan ensures consistent cash flow, enabling them to manage their subcontractors and materials effectively.
Disputes and delays are minimized when both parties understand and agree upon the payment terms upfront. A well-structured schedule typically includes initial deposits, progress payments tied to completed stages (foundation, framing, roofing, etc.), and a final payment upon completion and final inspection. Failing to establish a clear schedule can lead to payment disputes, project delays, and even legal issues.
Strategies for Minimizing Financing Costs
Minimizing financing costs requires careful planning and proactive measures. Improving your credit score before applying for a loan is crucial, as a higher credit score often translates to lower interest rates. Shop around and compare loan offers from multiple lenders to secure the most favorable terms. Consider the total cost of the loan, including interest rates, fees, and closing costs.
Negotiating a lower interest rate, even a small percentage point, can save thousands of dollars over the life of the loan. Additionally, explore potential tax deductions or incentives available for home construction in your area. These can offset some of your financing costs, making the overall project more affordable. Finally, carefully budgeting and managing your spending during the construction phase will minimize the need for additional financing or loans, ultimately saving you money in interest charges.
Sample Payment Schedule
A well-structured payment schedule is essential. Below is a sample, remember to adjust this based on your specific project and lender requirements.
| Milestone | Payment Amount | Due Date | Notes |
|---|---|---|---|
| Initial Deposit | $50,000 | Contract Signing | Typically 10-20% of total project cost |
| Foundation Completion | $30,000 | 4 Weeks Post-Contract | Upon inspection and approval |
| Framing Completion | $40,000 | 8 Weeks Post-Contract | Upon inspection and approval |
| Roofing Completion | $25,000 | 12 Weeks Post-Contract | Upon inspection and approval |
| Interior Finishes | $35,000 | 16 Weeks Post-Contract | Upon inspection and approval |
| Final Payment | $20,000 | Project Completion | After final inspection and approval |
Last Word
Building a custom home is a marathon, not a sprint. By carefully considering every aspect – from initial budgeting and land acquisition to material selection and navigating the complexities of the construction process – you can significantly increase your chances of a smooth and successful project. Remember, proactive planning, clear communication, and a thorough understanding of each stage are key to achieving your dream home.
So, breathe, plan meticulously, and enjoy the rewarding journey of creating a space uniquely yours.